Recent post

Showing posts with label Summer. Show all posts

UPDATE- WHERE HAVE I BEEN?

Monday, September 5, 2016


Hello everyone! I can't believe that it has been nearly half a year since I last wrote a blog post, I know that I have been slacking and again I apologise for this, in regards to my massive haul that I was supposed to upload, I ended up using most of my makeup before I got home and then I couldn't find all of it when it came down to taking photographs. I want to try and do some more reviews of new makeup products that I have bought recently, its just finding the time to do so. 

So in July, I went on a Mediterranean cruise with my family for my parent's 25st Wedding Anniversary, we visited the likes of Gibraltar, Nice, Cadiz, Palma de Mallorca and Malaga. We dined like royalty for two weeks straight, having 3 courses meals every single day. It's safe to say that I enjoy the comfort of my own home more than at sea. Being able to shove a pizza in the oven at 10pm is more me than having a set dining time every single day. 


Champagne popping for my parents anniversary


                     Shoes: http://www.shoezone.com/ £5.99! bargain

Anniversary attire

Dress : https://prettylittlething.com/lauriell-black-wrap-front-crepe-midi-dress.html
 (£20)


After enjoying a lovely mouthwatering 3-course meal on board in our favourite restaurant (Macbeth), we changed our outfits and hit the Magaluf strip for a few hours. To say it was an 'experience' is an understatement....


Magaluf attire 

Skirt: H&M I think from ages ago
Top: Bersheka in Spain
Hat : River Island 


Thanks so much for reading

Love Leah x


FALSE EYELASHES HAUL

Friday, February 19, 2016


FALSE EYELASHES HAUL

This week I visited my nearest Superdrug store and bought a few beauty products, including my favourites...false lashes!
I also received two sets of false lashes in the post yesterday and wanted to share them with you. 


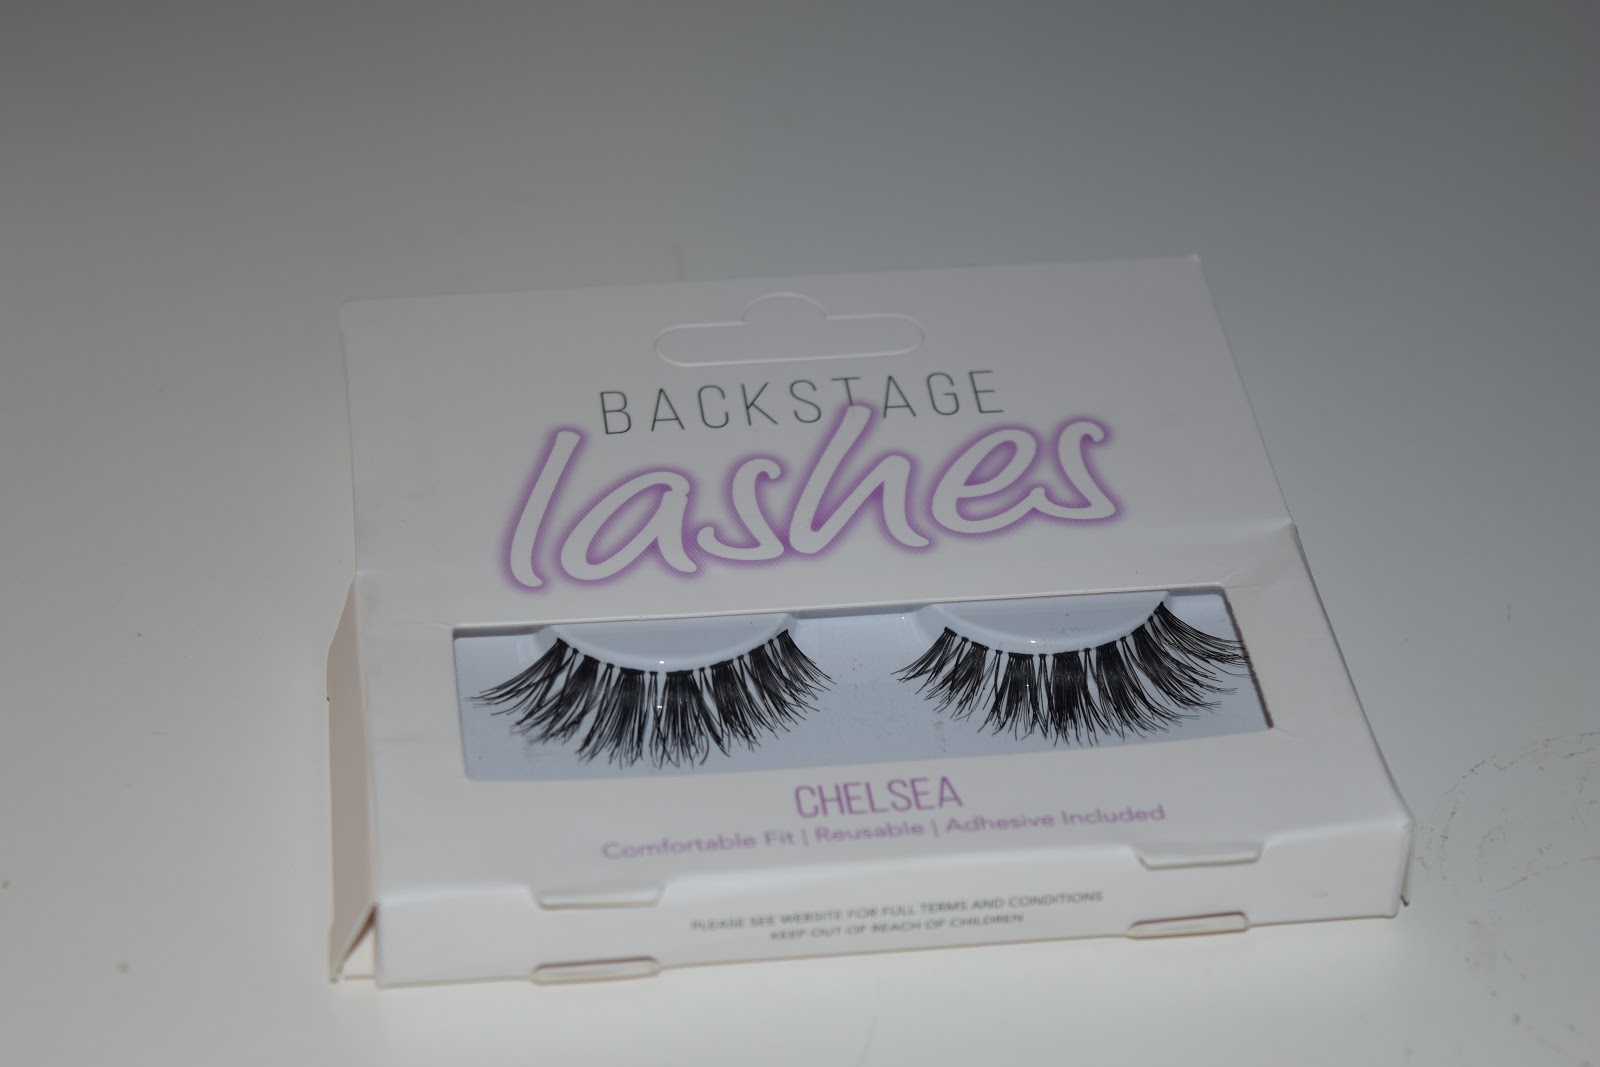
I have used the Chelsea lashes by Backstage beauty on many occasions and because they were so popular, I had to pre order some more. As the shipment took longer than expected the company kindly set me an additional pair of lashes (Essex) for free! I haven't tried out the Essex lashes before and I am really excited to see if they can replace my absolute favourite Chelsea Lashes.

I first heard of this brand from a famous Youtuber LoveLaughandMakeup otherwise known as Sabrina, who uses the Vegas lashes in many of her videos. I quickly became obsessed with this brand and rarely change companies unless I haven't had the chance to order a pair and I am going on a night out, then I'll quickly nip to Boots and get whatever is there.
 My absolute holy grail!! I cannot speak more highly of these lashes, they draw so much attention to my eyes and I often get many compliments from strangers on nights out about what falsies that I use! I tend to go over the lashes with a coat of mascara to make them appear more natural, although it isn't necessary. 


I have used the Eylure No 100 lashes before and they were actually really hard to apply! It usually takes me a few minutes to apply false lashes once I've done my eyeliner and mascara, however in this case I had to ask my sister to apply them for me because the falsies are curved and I couldn't get them to fit my eyes properly. Nevertheless I thought that I would give them another go because my eyelashes did look nice afterwards! 

I am so so excited to try out these lashes! My sister uses the other Vegas lashes in Easy Elegance and shouts her praises for them all of the time, I chose these lashes because they look very voluminous and lengthy which I adore! Superdrug currently has a deal on the Eylure lashes buy one get a second half price which I think is a really good deal if you wear falsies alot - like myself.

This was only a short blog post guys, stay tuned for more hauls and beauty/lifestyle related posts coming soon...

If you have any tips, tricks or blog posts that you want to see me do then please comment below

Thank you for reading

Love Leah x

5 HIGH END AND HIGH STREET FOUNDATION REVIEWS, SWATCH TESTS

Thursday, July 30, 2015


Hello everyone! 

Today I will be reviewing five different foundations that range from light to full coverage. The prices between my foundations vary; with some being high-end and others being high street. Some of these foundations I have been using for years and others I have been using for a few weeks. I will be providing you with SWATCH tests on all of the foundations, and showing you the tools that I use to create a flawless finish.


( Left to Right : No7 Stay Perfect Foundation, Maybelline Fit me Foundation, MAC Studio Fix Fluid, Estee Lauder Double Wear Foundation and Revlon's Photo Ready Foundation)


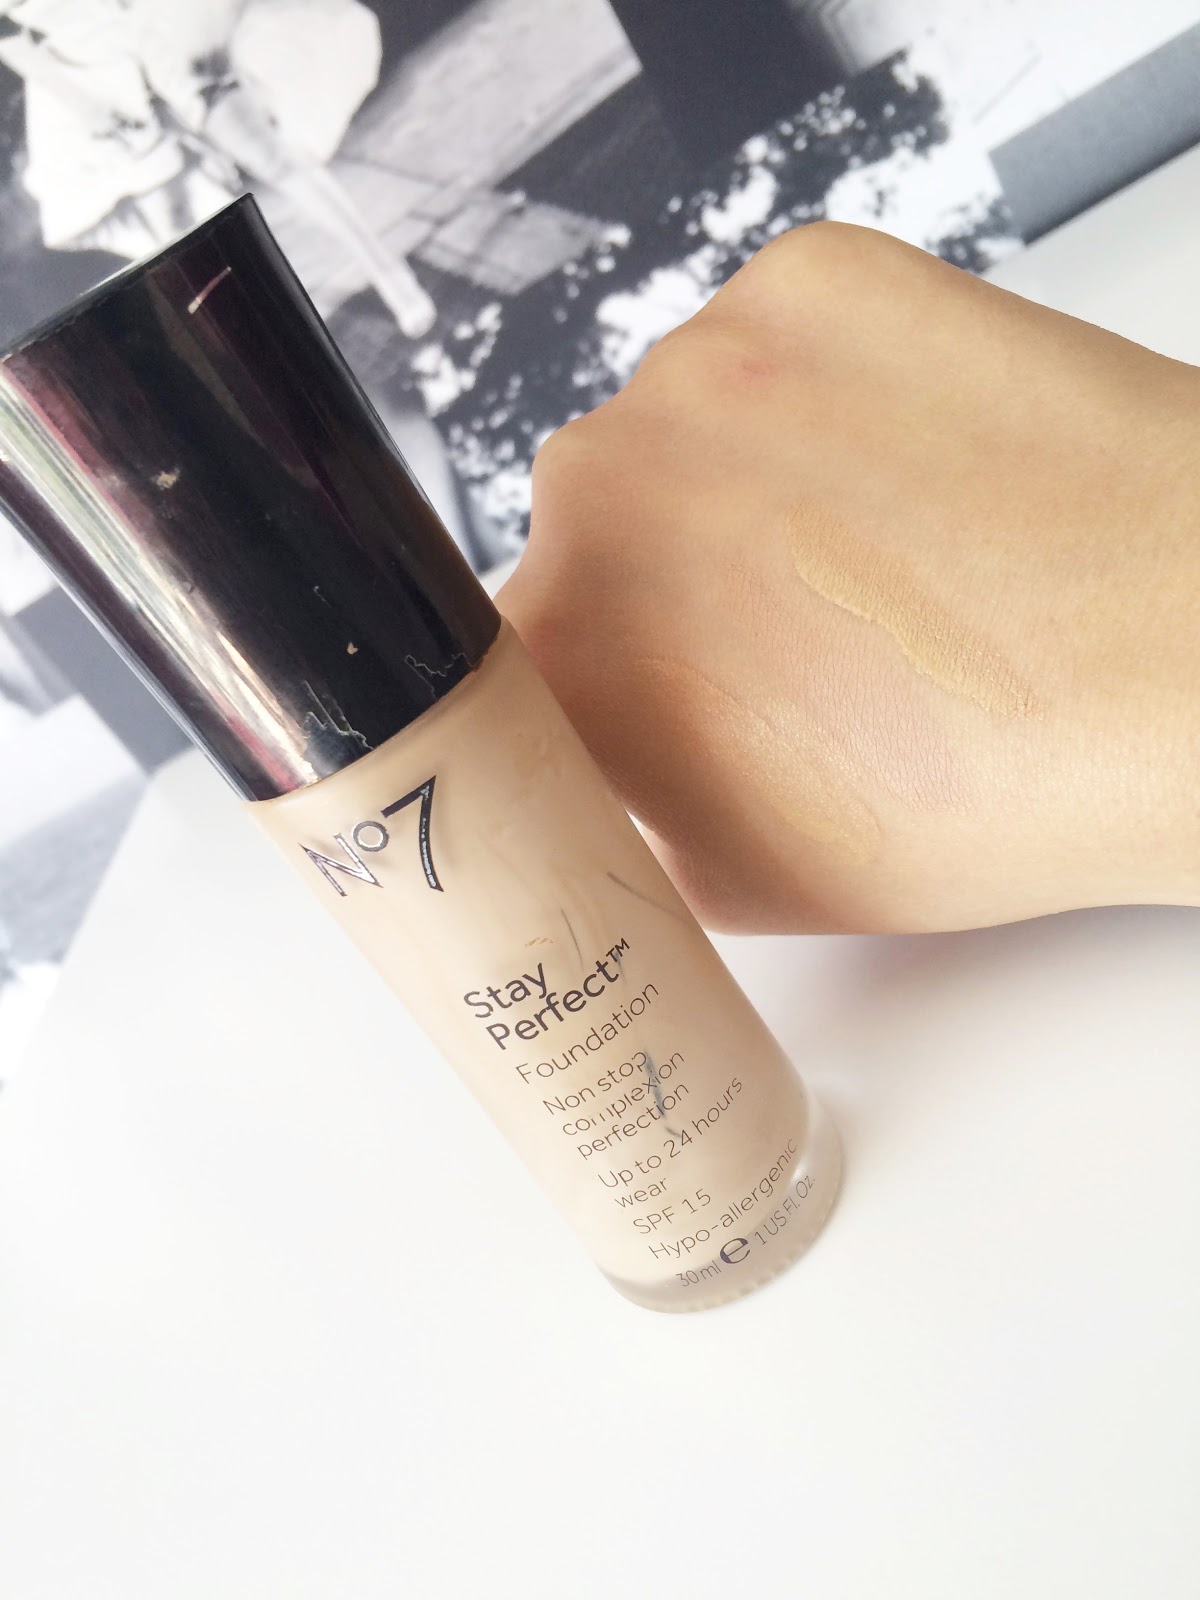
I have been using this foundation for a good two years now, its light-weight and easy to build upon. This foundation is medium to full coverage but requires a couple of layers to create a flawless look. I would recommend this product to people with combination, normal to dry skin because the foundation is moisturising and has SPF15 inside it. The colour match service provided by Boots is fantastic because you're guaranteed to find a foundation in your shade as there is a wide variety. I don't really think you could go wrong for £14.50 when the foundation lasts for ages. The foundation matches my skin tone so well, however I usually opt for darker shades because I want to be more tanned.

I would rate this foundation a 3.5/5 because it's lightweight and good for the price!

I apologise for the poor lighting guys, the light brown colour on the far right is the shade of this foundation. 


This foundation got recommended to me by a friend a couple of months ago, she has the same skin tone as me and used this product religiously. I thought I would try it out and see what the hype was about; first of all I think that the packaging is really boring.
 The packaging of a product is so important because it usually determines whether I buy it or not; sometimes I've bought products purely because the packaging was nice. The foundation retails at £7.99 which is really affordable if you're on a budget. 

The shade range of the Fit me foundations really dissapointed me because in my local Boots there was only a choice of 3 colours to choose from. However, when I looked online there is a variety of shades but it is a massive gamble because you don't know what colour will match your skin tone best. I feel like Maybelline doesn't really cater to darker skin girls, which is a daily struggle for me.
In terms of coverage, I would say that this foundation is light to medium because it doesn't completely conceal impurities but can be built up. I usually use one layer of this foundation before I apply my MAC Studio Fix Fluid to create a matte finish.

I would rate this product  2.5/5 because of the lack of shades available for darker skin zones.


I have only used this foundation a handful of times, it is medium coverage which can be built up to full coverage. I do find that if I apply this foundation after I have put a primer/moisturiser on my face first that it becomes very oily and tends to come off my skin very easily. Although there is a wider variety in the shade range for Revlon as opposed to Maybelline, the foundation itself is very pinkie/yellowy toned and would need to be mixed with another foundation to avoid this. 
So far this foundation hasn't wowed me and for £12.99 in the Beauty outlet, I thought it would have by now. 

I would rate this foundation for a 2/5 purely because it doesn't stay on my skin for very long and I hate having to apply loads of layers throughout the day. 


This is one of my favourite foundations because it has a matte finish and is full coverage! I am so obsessed with foundations that provide full coverage to hide my blemishes. I have heard so many mixed reviews about this product that I decided to try it out for myself!. I have worn this foundation out on many nights out and it has stayed in place all night long. It is more on the high-end spectrum of foundations retailing at £30.00, which is a good investment if you like high-quality products. I had my shade tested for this foundation back in February and after going on holiday, I have come back too dark to be able to wear this. Even 3 months after I came back from holiday, it is still too light for me which secretly breaks my heart. So I think this foundation will have to be saved for the winter when I am slightly lighter.

I would rate this foundation 4/5 because although it's an all-round great foundation, it can sometimes be hard to remove using make-up wipes or Garnier Micellar water.

As you can see from this picture, Ivory Beige is way too pale for my skin at the moment *sighs*


 And my all time favourite foundation goes to........ MAC Studio Fix Fluid. I purchased this foundation on holiday for around $30 and can't get enough of it! The texture of the foundation is very creamy and it applies evenly if used correctly (with a beauty blender). This product is full coverage and I tend to use one layer day to day, and two-three layers if I am going on a night out. This shade is darker than my natural skin tone, however when mixed with concealer it evens it out.
I have had this foundation since April and I still have loads of product left, despite using it everyday which is great!

The only thing that annoyed me about this product is that it didn't come with its own foundation pump, which makes it extremely difficult to pour out. I eventually bought my own one because I got frustrated with how much product that I was wasting when doing my foundation.

I would rate this foundation a 4/5 because there is a wide variety of different shades and the coverage is fab!.


Final SWATCH test 

Left to Right ( Maybelline Fit Me Foundation, Estee Lauder Double Wear, No7 Stay Perfect Foundation, Revlon Photo Ready Foundation, and MAC Studio Fix Fluid)


FOUNDATION TOOLS


A beauty blender


Makeup brushes


Thank you for reading my blog post! Comment below your favourite foundations and any you think that I should check out :) 

Love you all


Leah x


CHEAP EBAY FINDS INCLUDING A BRUSH SET, A BEAUTY BLENDER AND A BLACK HEADS REMOVER

Wednesday, July 22, 2015


CHEAP EBAY FINDS

Hello everyone! Firstly, I would like to apologise for my lack of blog posts for the past month or so; to say that I have been busy is probably an understatement. I have recently started a new job so alot of my usual free time has been taken up with that! 

Today, I am going to be showing you some of the cheapest beauty products that I have found on Ebay over the past week. 

This is a Beauty blender that I found on Ebay for £1.95; which I think is amazing because when you compare the price of this Beauty blender to say Real techniques which is £5.99 or to Beauty blenders own make which is £16.00, you'll find that you found yourself a bargain. 

I will be using my beauty blender to blend in my foundation and also to highlight my under eyes.

These brushes came in a set of 10, and contain 5 foundation brushes. 


1. Angled Kabuki Brush - Buffs bronzer or blusher onto the skin
2. Round Kabuki Brush - Blends mineralised powders/products onto the skin
3. Tapered Kabuki Brush- Blends foundation onto 'hard to reach' contours of the face
     4. Flat Angled Kabuki Brush - Good for concealing 'hard to reach' areas of the skin
5. Flat Kabuki Brush - Use on flat areas of the face e.g. forehead or cheeks with liquid foundation

Although it says in the description box on Ebay that these products should be used for eyeliner,
 I think that I will find better use out of them for concealing and highlighting my under eyes; and I will probably use the thinnest brush for blending/contouring my eye shadow.

The whole brush set of 10, came to £4.99!!!! I couldn't believe my eyes when I first saw them on Ebay. 
I thought to myself ......'Hmm whats the catch here..maybe its from another country'' but when I checked the location it said Manchester. 


Now the brushes came in a range of different colours; black & silver, black & gold, white & gold, pink & silver, pink & gold and blue and silver. 

I decided on the black and silver because I thought they looked so classy and very similar to the Sigma brushes. The only difference being that these brushes are a fraction of the price.

I think that these brushes are great for beginners just starting out with make-up, or for individuals (like myself) who just like experimenting with make-up and trying out loads of different looks. 

I will be displaying the brush sets in these cute little candle holders which I picked up several months ago from B&M bargains.


I have heard so many different things about Pilaten's Black Head Pore Strip, that I decided to just buy them and make a decision for myself! I bought 5 strips on Ebay for £3.39 which is really inexpensive. For anyone who doesn't know how these strips work, basically you apply a thin even layer over the top of your nose and wherever else you have black heads on your skin. You leave the solution on for 10-15 minutes and after you peel it off; just like a face mask!.


 I will be dedicating a whole blog post to reviewing all of these products and many more so stay tuned for that guys! 


Thank you for reading my blog post! I hope you all enjoyed my cheap Ebay finds, comment below if you have any cheap Ebay finds that you would like to share. I'd love to hear them :)

Love you all

Leah x


W7 EYESHADOW PALETTE REVIEW

Monday, June 8, 2015


W7 EYESHADOW PALETTE REVIEW 


Hello everyone! I recently purchased a new eye shadow palette from the new beauty store in the outlet and wanted to share my review on the product. I purchased the palette for around £3.99 but it can be bought for £5.95 from W7 Cosmetics.

Please note that all links to where my products are from will be listed at the end of my blog post.


Brown has always been my 'go-to' colour as such, in terms of eye shadows. I think that it really suits my caramel complexion and creates a striking look. 

I purchased this palette over a week ago and have been using it religiously ever since. The pigmentation of the eye shadows is fabulous and lasts all day long! I always hate it when I buy a new eye shadow palette and the eye shadow wears off throughout the day, and I have to keep topping it up. 

I would highly recommend this product to a amateur makeup enthusiast (like myself) or a beginner who is just starting out, it really is value for money and you can't really go wrong with getting 10 eye shadow colours for the inexpensive price of £3.99.

I really appreciate that the palette comes with two applicators to apply the eye shadow, because it can be awfully tedious using your hands ( which is something I rarely ever do).  

I tend to pick one of the lightest shades first, in this case I used the third pink shadow on the top row. I applied this all over my eyelid as a 'base' colour, then I selected another colour (the brown directly below it) and blended them together. I gradually built up my 'smokey eye' look by applying (the brown shade next to it) and merged this onto the crease of my brow bone to contour. Lastly, I chose the darkest brown shade to define and blend in the edges of the outer corner of my eyelid. 

I think that my look proved successful because it doesn't look too overpowering with the bold red lipstick, enough attention can be drawn to both features and they compliment each other well. 


Next time, I will improve this 'smokey eye look' by combining glitter eye shadows in particularly Boujois Little Round Pot Eyeshadow in 09 and W7's In the Buff Eyeshadow Palette in Topaz to create a breath-taking look. 

Please excuse the glue marks on my eyelids, obviously I was wearing false lashes in this photograph.


Here is the eye shadow brush that I used, I know that it is not commonly used for eye shadow however it works best for me when shading and blending in the different colours. 


 I completed my look with a bold red lip -  L'Oreal Paris Color Riche Scarlett Creme in the shade : 461.

LINKS:


I hope you all enjoyed this look as much I did creating it! Thank you so much for reading my blog posts it honestly means alot. 

Love you all


Leah x 


MY NIGHT OUT MAKEUP INSPIRED LOOK

Sunday, May 24, 2015


MY NIGHT OUT INSPIRED MAKEUP LOOK


Hello everyone, today I have a 'night out inspired makeup look' that I wanted to share with you all. I was experimenting with a few new products and managed to find a look that I really liked, I will post all of the products that I have used below and will show the final result at the end.


After I have moisturized my face, I go ahead and grab my Rimmel Stay Matte Primer. I'm not a big fan of this primer because I notice that most of my foundation still comes off throughout the day, However I have lately been borrowing my sister's Smashbox Primer which I have noticed is alot better because my foundation stays on for alot longer. After I have primed my face I use my Under Eye Primer by Elf. I have only used this product a handful of times so I can't really judge whether its working or not. Last of all I prime my eyelids to ensure that my eyeshadow stays on. I use Elf's Two in one Eye Primer and Liner Sealer to do this.

I use No7's concealer in the shade : Warm beige, as a base for my foundation and under eyes. The texture of the concealer is very powdery so for this reason I also use Max Factors Master touch under eye concealer (in the shade: Beige 309) to highlight my under eyes. I have re-purchased both items many times and would recommend them to people who suffer from blemishes because they work really well together to disguise them. After this I take my No7 Stay Perfect Foundation and blend it into my face; my skin tone is practically identical to this shade so it works well. I use Mac's Studio Fix Foundation to add colour to my face. I really like that the MAC foundation is matte instead of dewy because I adore the whole 'flawless' look which it gives.
I used Elf's Tantalizing Taupe Eyeshadow to create a 'Smoky eye look'. I have only used this eyeshadow palette once (today) and from following the instructions on the back of the box I can honestly say that I love this palette!. The colours are easy to blend and all compliment eachother well. 


I have been using Elf's Eyebrow Kit for quite some time now and couldn't recommend it any higher. This brow kit is so inexpensive and yet transforms bushy brows into sleek on fleek brows haha. It is a common fact that I have never really had the best eyebrows, but from using this kit it has made grooming my brows alot easier. 
I line my top lash line with Loreal Paris's Super Liner and line my lower lash line with Rimmel London's Precision Eye Liner Pencil. I am sure that they're better alternatives to eyeliners in high street shores but for the time being I will continue with using both of them because they do wonders when trying to create a 'cat eye' look.

Maybelline's Lash Sensational Mascara is my favourite mascara to date! It volumizes my lashes whilst making them look fuller and separated. I cannot recommend this product highly enough. On days that I am going out somewhere nice; I will go over my lashes with Rimmel London's Wonderfull Mascara. This works wonders on my lower lashes, making them appear long and seperated. 

I use my Estee Lauder Lash Primer Plus before I do my mascara to lenghten my lashes; this makes it less likely that they will get clumpy. On my lower lashes I use No 7's Lash Impact Intense Volume Control Mascara to give my lashes a bold look. 

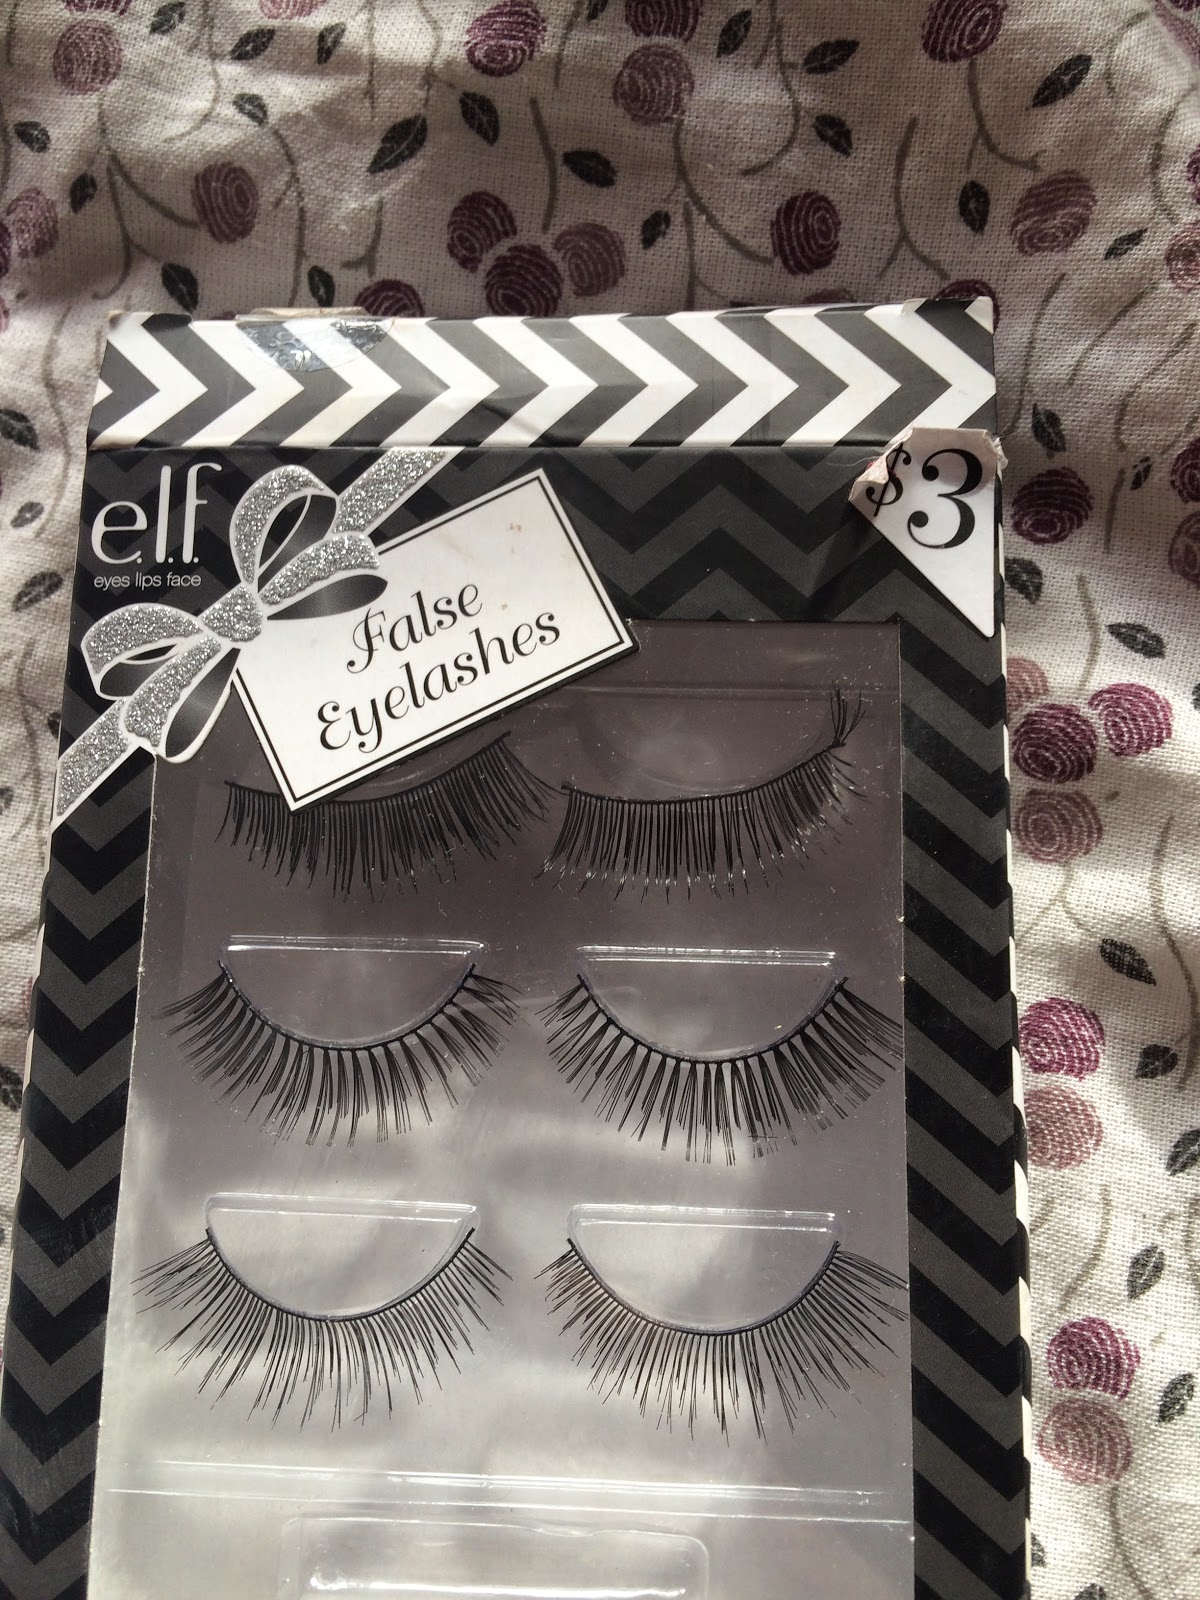
I used Elf's False Eyelashes to draw more emphasis to my eyes. ( I used the bottom lashes in the pack). This is the first time that I have used these lashes and I would 100% use them again because the application was easy, it came with glue and it took less than 5 minutes to put both on. 

Note to self: I measured the lashes against my own before I applied them, unfortunately they were too big so I had to cut them down. After this I put glue on each lash line and waited for it to go tacky (around 30 seconds) then I applied the false lashes using tweezers. 


Finally, I selected my favourite lipstick No7's Stay Perfect Lipstick (in the shade 'Raspberry Blush').


Left to Right: MAC'S Concealer Brush, Real Technique's Foundation Brush, Real Techniques Foundation Brush, Real Techniques Powder/Bronzer Brush, an Eyeshadow Brush and an Eyebrow Brush. 

The finished look. 


Thank you all so much for reading my blogposts, I know I don't post alot but it means alot knowing that some people will see this!

I can't promise that I will be posting alot of blog posts soon because I am over run with college exams; however I will try to do as many as I can when I have the time. I am still in the process of experimenting with makeup and hope to get better and better at it, if I find a particular look that I like or enjoy creating then I will write a blog post on it and share it with you guys.

Love you all

Leah x